Get notified every time an agent provides fewer or more items from what it would normally extract. Keep track of the extracted item count, by allowing Mozenda to compare the resent run count with the average of the counts of past runs.
Step 1: Activate Item count validation
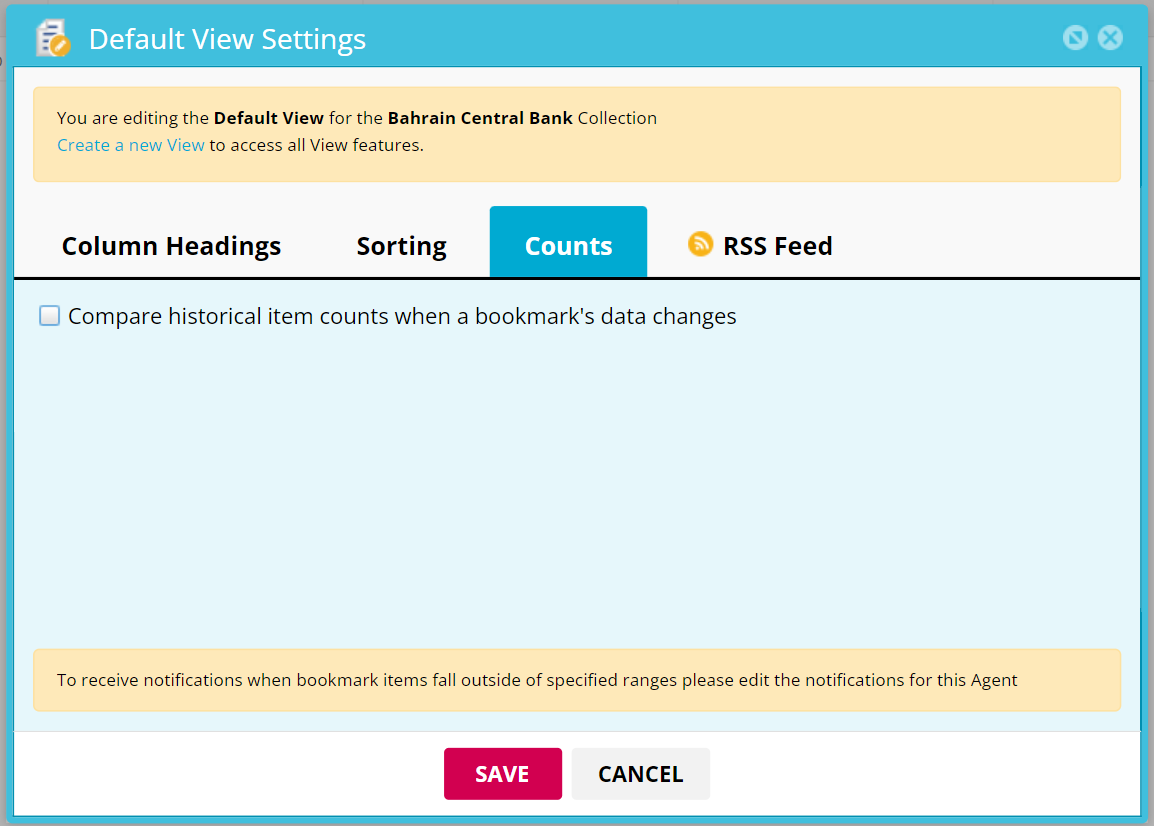
In the Web Console, select an agent view:
- Go to View Settings > Counts
- Enable the Compare historical item counts checkbox
By enabling this, you allow Mozenda to store the counts of the items of the view, up to the last 10 runs.
- Set up the validation acceptance criteria by configuring the following threshold percentages"
Increase percentage max: “Item count shouldn’t be more than 100 + 50% of the average item count.
Decrease percentage max: “Item count shouldn’t be less that 100 - 20% of the average item count.
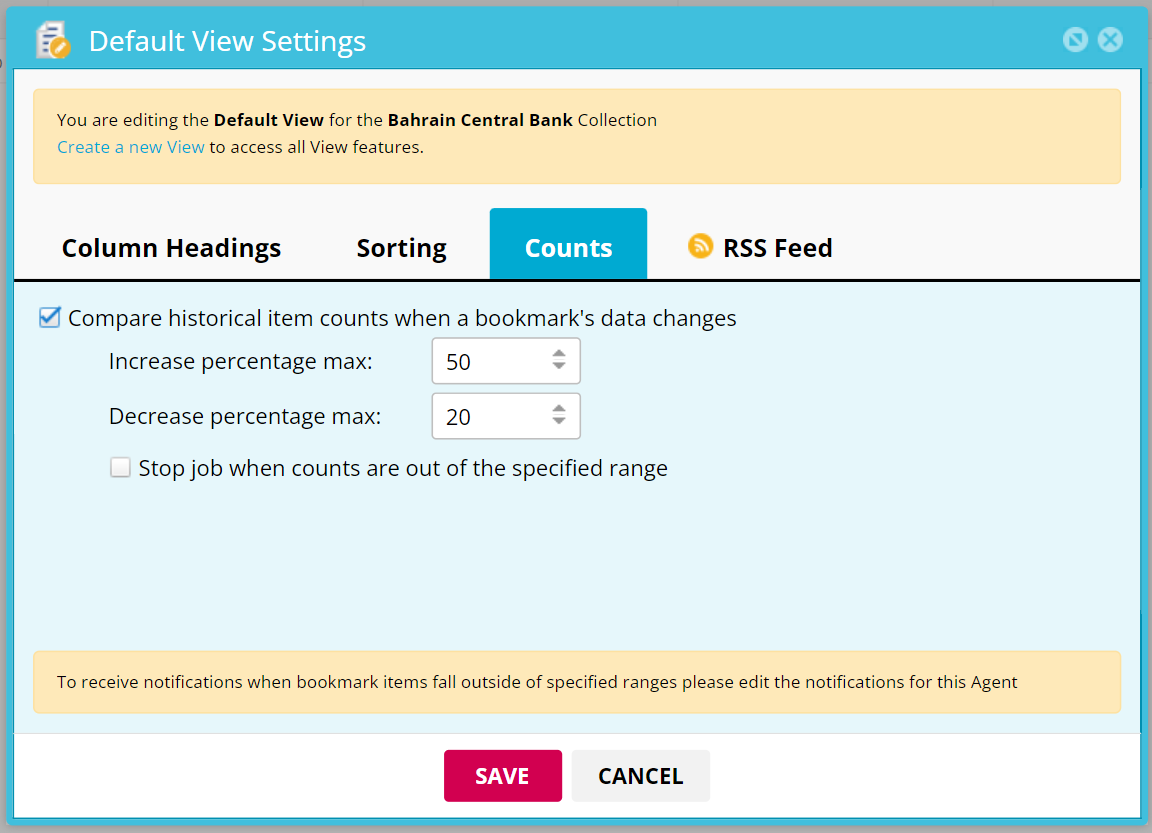
- Stop job checkbox: Stop the job when counts exceed the specified range.
By enabling this setting, the process of the agent will stop at the "Refreshing state" if the item count of the run fails the acceptance criteria (produces more or fewer items). For example, it will not publish, or it will stop a sequence. - Click Save.
You can activate item count validation for an agent group:
Select an Agent Group > Data tab > Select a view > Edit view > Counts
You can activate item count validation in multiple agents simultaneously, by multiselecting agents in the agent view.
Select agents > Click More > Set view count settings
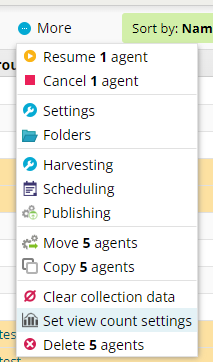
Apply the historical item count settings to all of your selected agents' views or just one of them by configuring the "View Name" dropdown.

Step 2: Turn on notifications
Set up agent's specific e-mail notifications when the following incidents occur:
Data was successfully added to the bookmark: Get an email when a run provided data within the defined item count range.
Data failed to be added to the bookmark: Get an email when a run provided data outside the defined item count range.
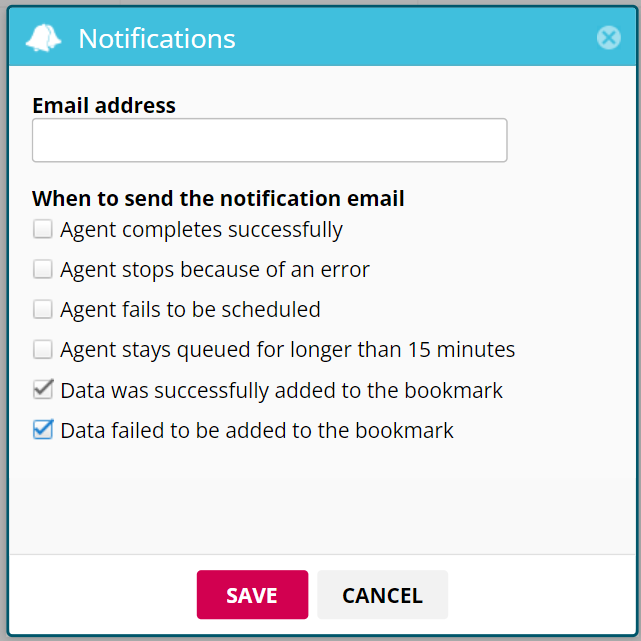
You can also apply the same notification settings globally, or for specific agent groups.
Stop job when counts are out of the specified range
If the "Stop job when counts are out of the specified range" checkbox is enabled, then the process of the agent will stop at the "Refreshing state". In this case, the agent will stop, and won't publish, or in case of a sequence, the sequence will not continue to the next step. Also, the row count of that specific run, will not be calculated in the historical item count.
Under the agent's job tab, Mozenda will provide an error code with the name: BookmarkitemCountValidationFailed

You can still however choose to Resume the process. In this case, the agent process will be resumed, and the item count of this run will be calculated in the historical item count average.

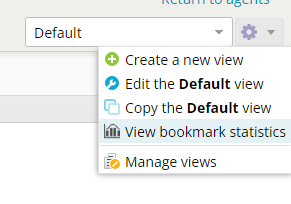
Manage historical counts
View the historical item counts under "View bookmark statistics" option of the view dropdown.
Delete statistics of your preference:
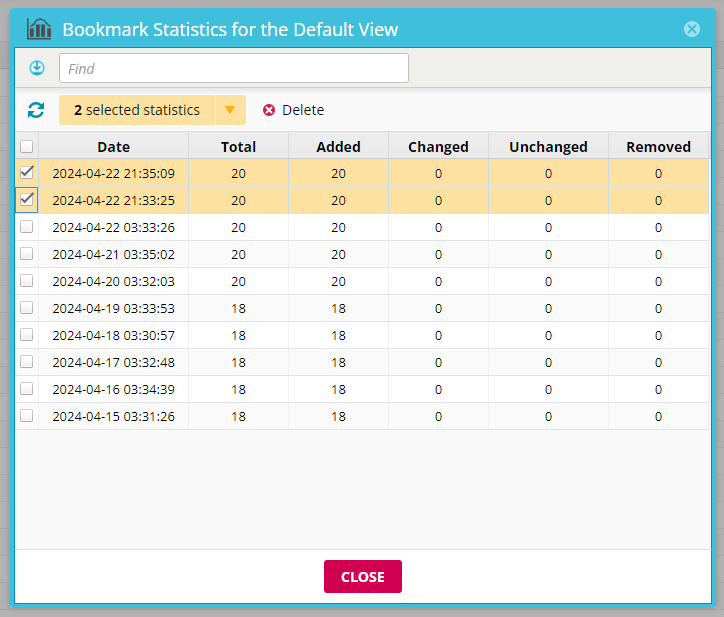
- Select view bookmark statistics from the dropdown
- Select one or more counts
- Click delete
- Click yes
Export a report of the bookmark statistics by clicking the export icon and selecting the file format you want.
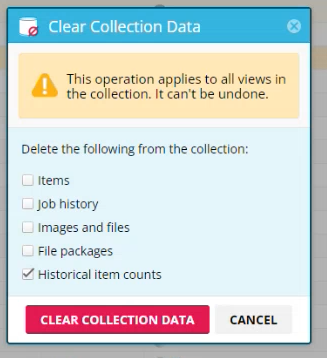
Clear historical item counts
Reset the historical item counts average calculation under "Clear Collection Data" settings.
- From your Agent List select one or multiple agents
- Click More
- Select Clear Collection Data
- Select "Historical Item counts"
- Click "Clear Collection Data" button