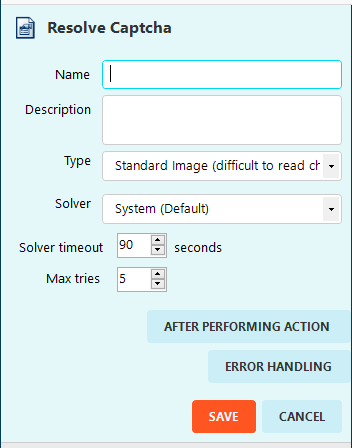
Resolve Captcha
Setting up the account
- Navigate to the Mozenda Web Console and navigate to Account Settings Summary
- Select the Account menu → Captcha Solvers
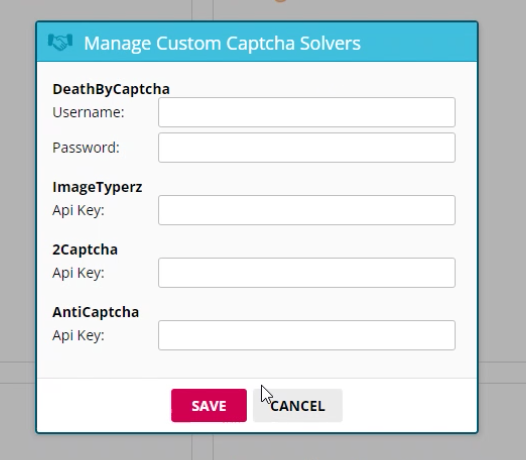
3. Fill out the information for the Captcha Solvers that are needed.
4. Close and restart the Agent Builder.
Using the Captcha Solvers in the Agent Builder
- In the Agent Builder, click on Add action
- Select Resolve CAPTCHA
- The Resolve Captcha Action will try to find the type that best fits what is found on the
page. If it doesn’t find it correctly please select the Solver and Type according to the
captcha that is needing to be solved on the page.
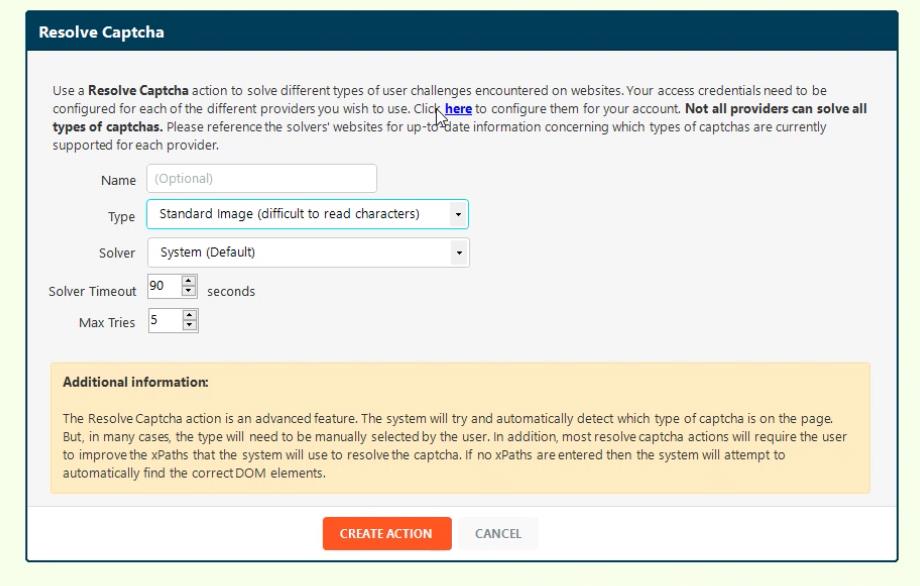
- Name (optional - can be “DomainNameCaptcha” for instance)
- Set up the Type of CAPTCHA to solve (a quick internet search can inform you
which type of challenge is faced if you aren’t sure) - Select the Solver that you would like to use. Only the Press and Hold and Slide to verify types are supported by the System. Not all types are supported by all
Solvers. Please consult each provider’s website for current information regarding
what they support and their pricing. - Set the Solver Timeout - 90 seconds is fairly standard as some challenges
require a longer time to be processed by the 3rd party captcha solver than others - Set the Max Tries - note that some providers charge for every attempt, even
when unsuccessful. More info on the provider help page. - Click on Create Action
- If the system doesn’t find the proper locations the user will be prompted to help
associate locations.
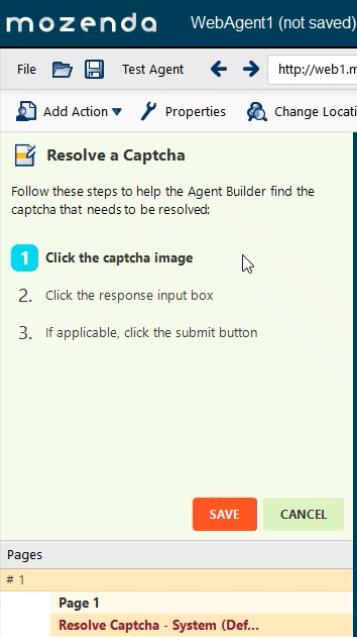
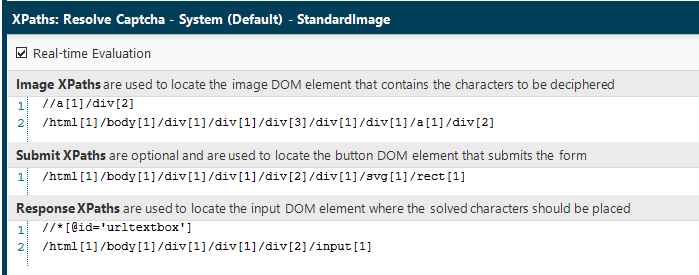
- The XPaths pane will show contextual information about what each of the xPaths are
used for based on the Captcha Type that is selected. Not all xPaths are used for all
types..E.g.,
- Whenever the captcha type is changed in the Action properties the default options and
xPaths for that type are reset.
