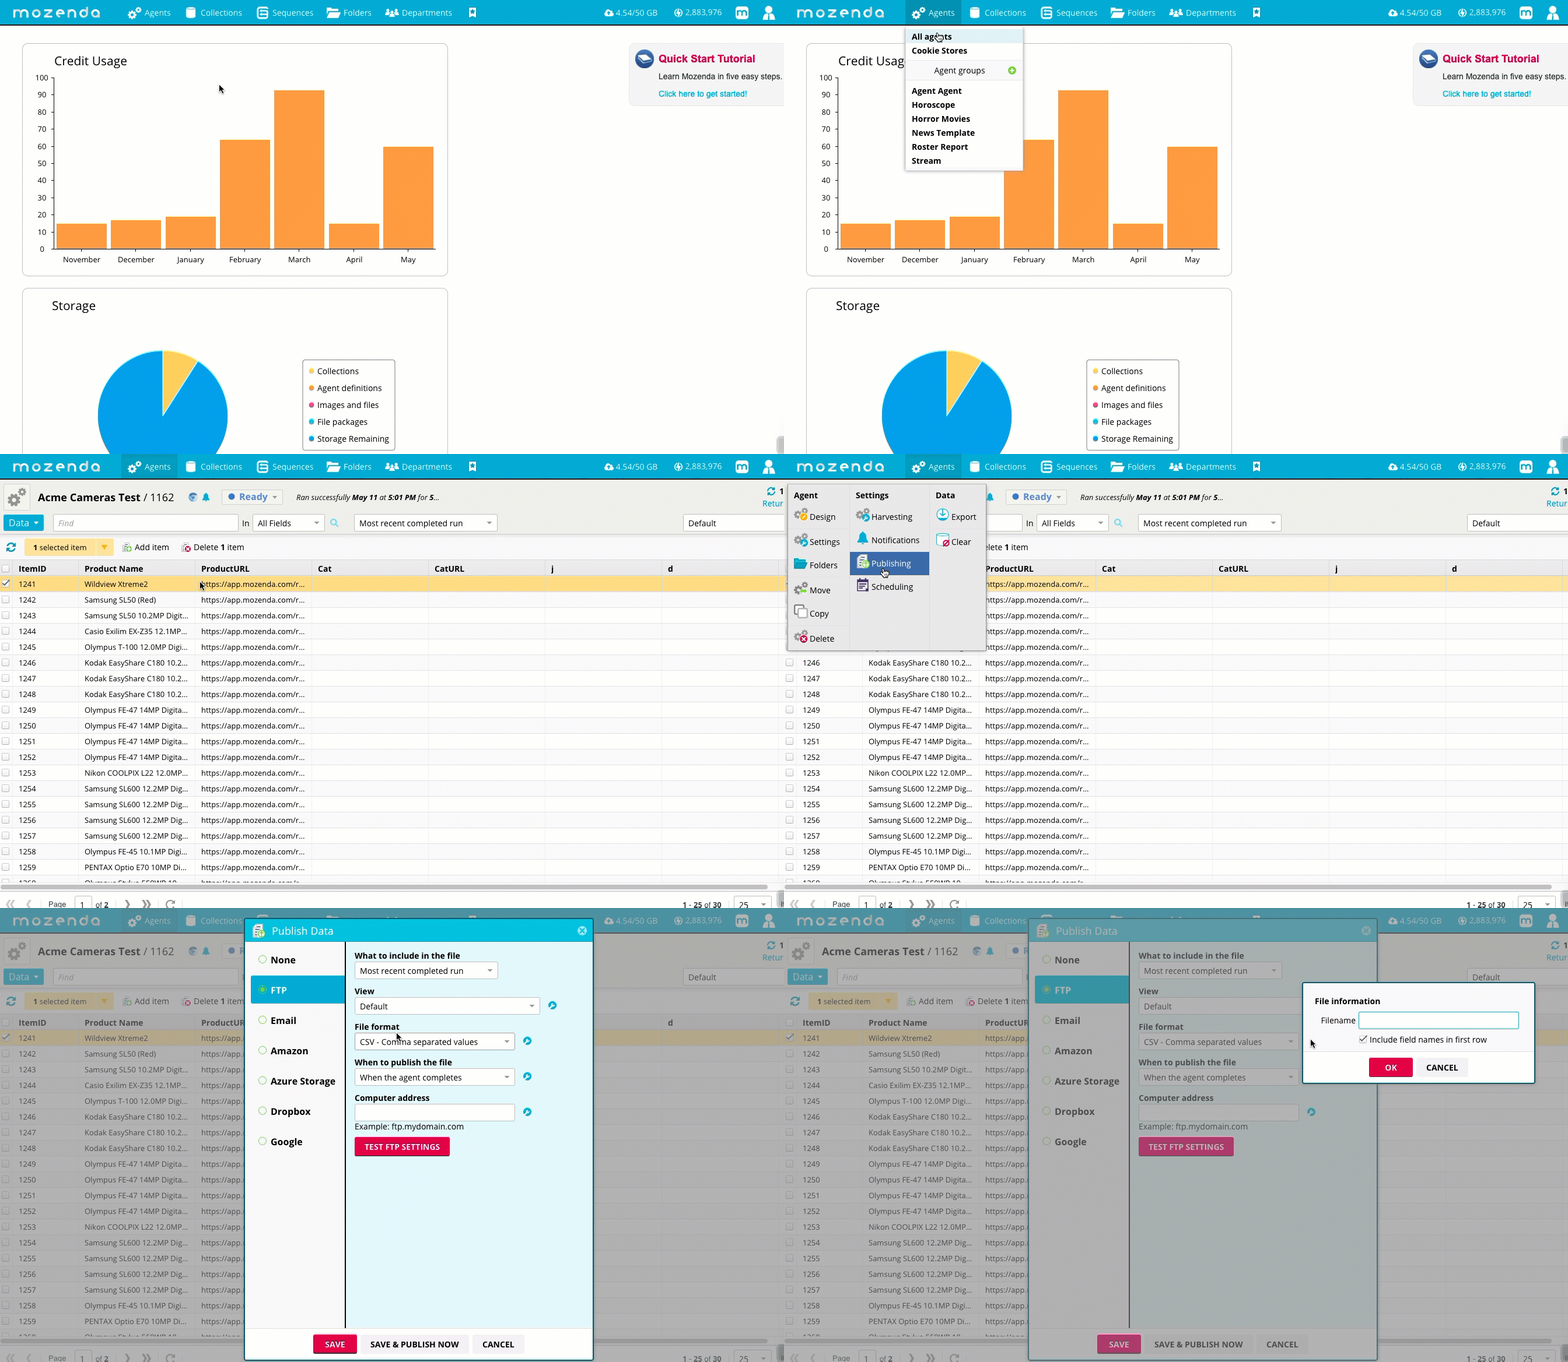
After your agent runs in the Web Console, there are several ways you can view, report, or export the information for other uses including publishing to:
- CSV or Excel format
- FTP
- RSS
- The cloud (Dropbox, Amazon S3, Microsoft Azure)
You can customize the filename for any resulting collection.
Customize the filename for a collection or agent
In the Web Console:
- Select Agent or Collection.
- Select the name of the agent or collection.
- Select
 .
. - Select Publishing.
- Select
 .
. - Enter the custom name in Filename. If the filename is left blank, a filename is created in the following format:
%Collection Name%-%View Name%. - Select SAVE

Filename specifications
For example, specify CNN-%Date% to include the date:
CNN-2019-01-18.csv
See the following table to specify different dynamic naming conventions.
| Format | Filename |
|---|---|
| %DateTime% | This will insert a date time value in the format of YYYY-MM-DD-HHMMSS. |
| %Date% | This will insert a date value in the format of YYYY-MM-DD. |
| %YYYY% | This will insert the current year in the format of YYYY. |
| %MM% | This will insert the current month in the format MM. |
| %DD% | This will insert the current day of the month in the file name. |
| %CollectionName% | This will insert the name of the collection. |
| %CollectionID% | This will insert the ID of the collection. |
| %AgentID% | This will insert the ID of the agent (when applicable). |
| %ViewName% | This will insert the name of the view. |
| %ViewID% | This will insert the ID of the view. |
Note
If a file with the same name exists when the system publishes the file, Mozenda will overwrite the previous file. You can avoid this by adding date or time variables to the filename.